How to use GIMP for figure processing
This post explains how GIMP can be used to process figures (format size, blur image, insert title, etc.), such that they fit the required standard for blog posts.
Published on March 24, 2023 by Fabian Kutschera
how to gimp blog
1 min READ
I introduce the steps how the title figure of a blog post can be generated, with the white bold title overlaying the blurred image. Since the post Present-day kinematic motion of Anatolia links global and regional plate tectonics, I searched for a related figure and came across an interesting article in Science, which displays a color-coded mid-ocean ridge.
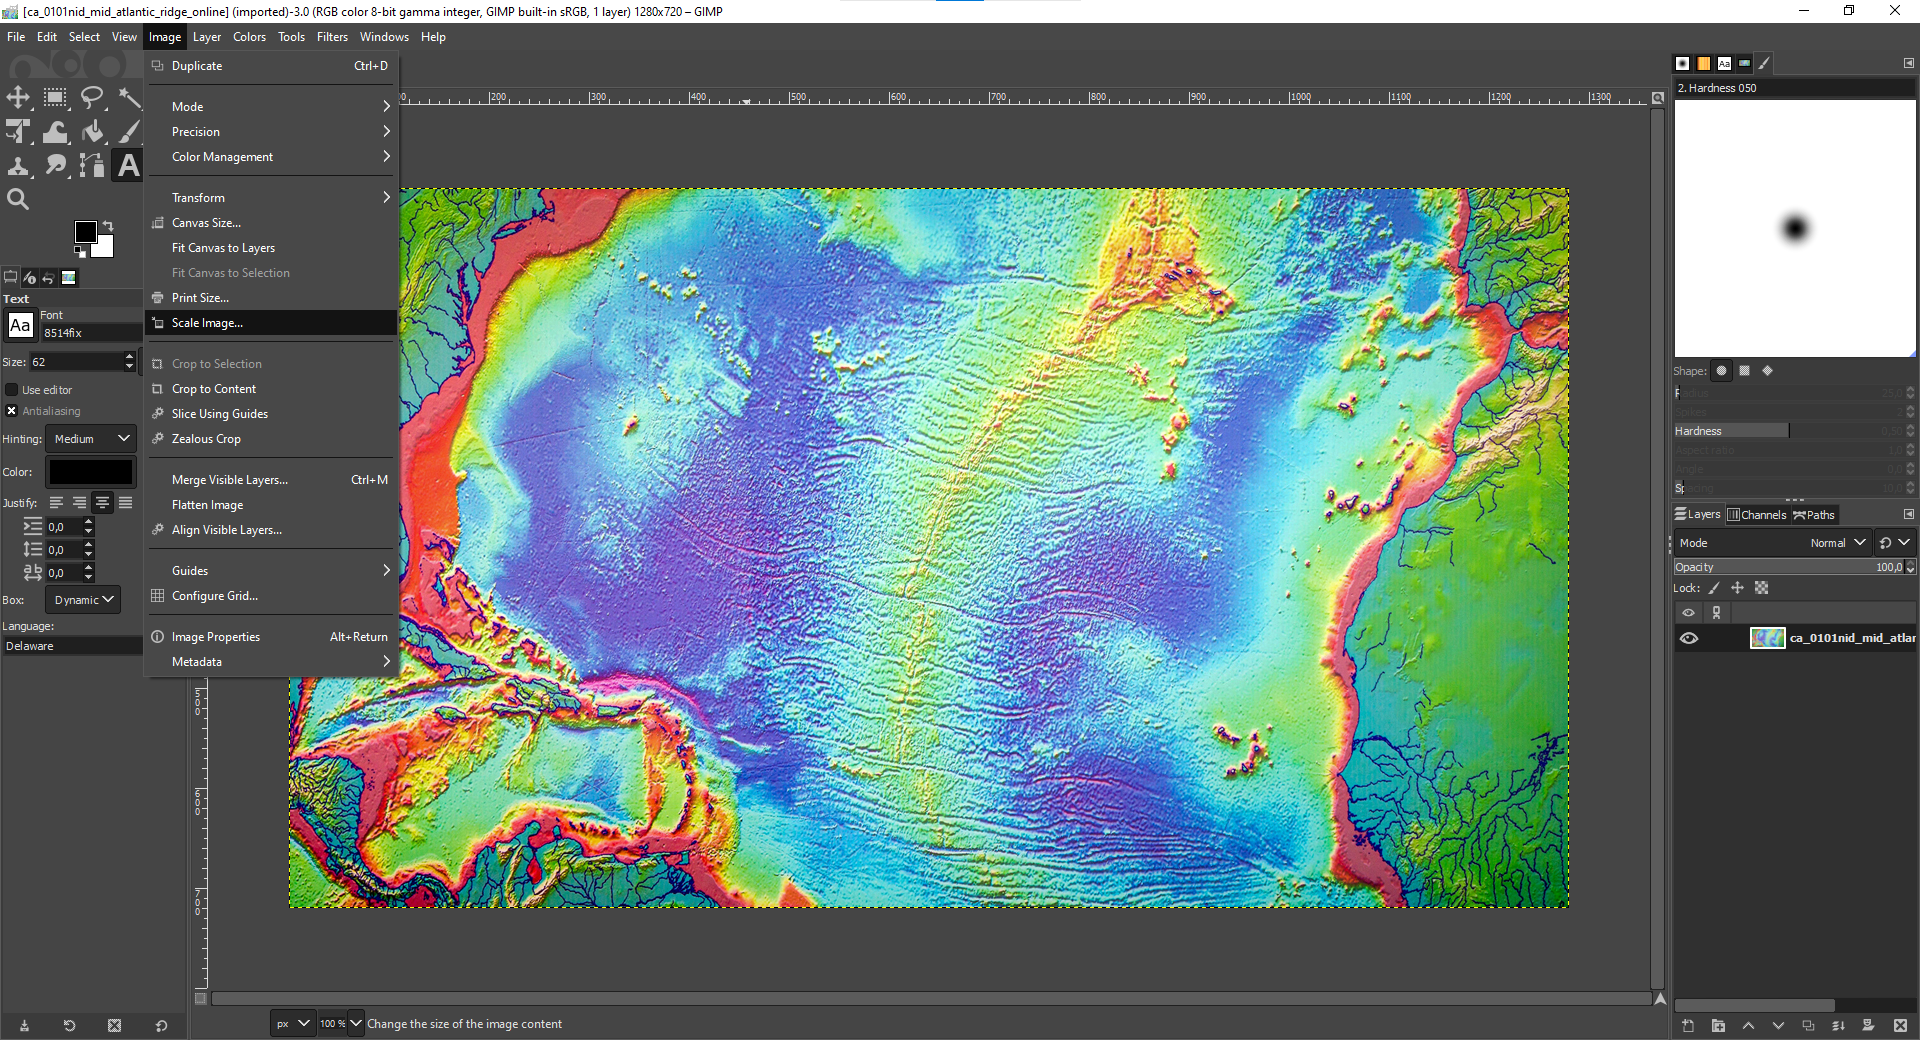
I was lucky, because this figure has already the required size of 1280x720, otherwise a rescaling would have been necessary to avoid showing a distorted figure in the blog post. However, changing/extracting the preferred size of a .png figure is also easily possible with GIMP, a free & open-source image editor (I used the most recent version 2.10.34).
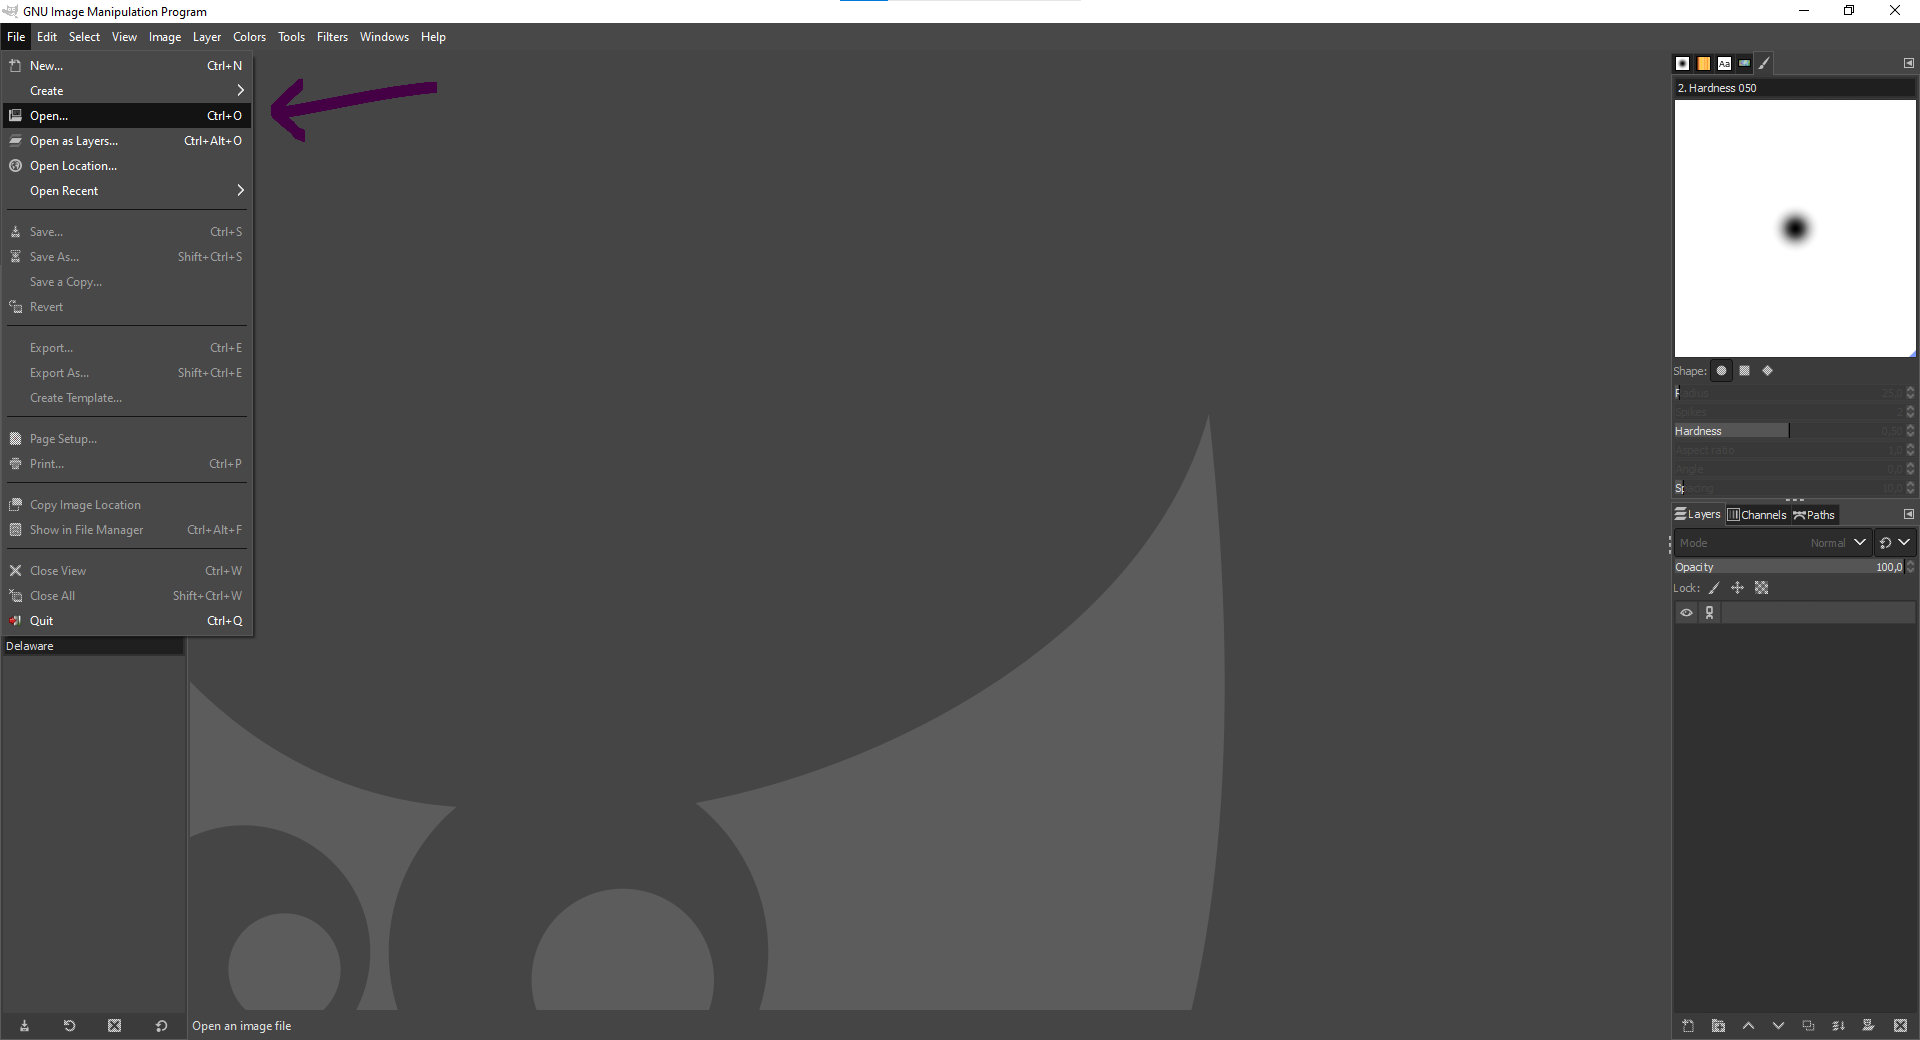
Load the .png figure into GIMP.
Check the size of the figure (should be 1280x720) and potentially rescale. In case resizing is necessary, please consult Gimp Quickies or Use GIMP to Resize an Image.
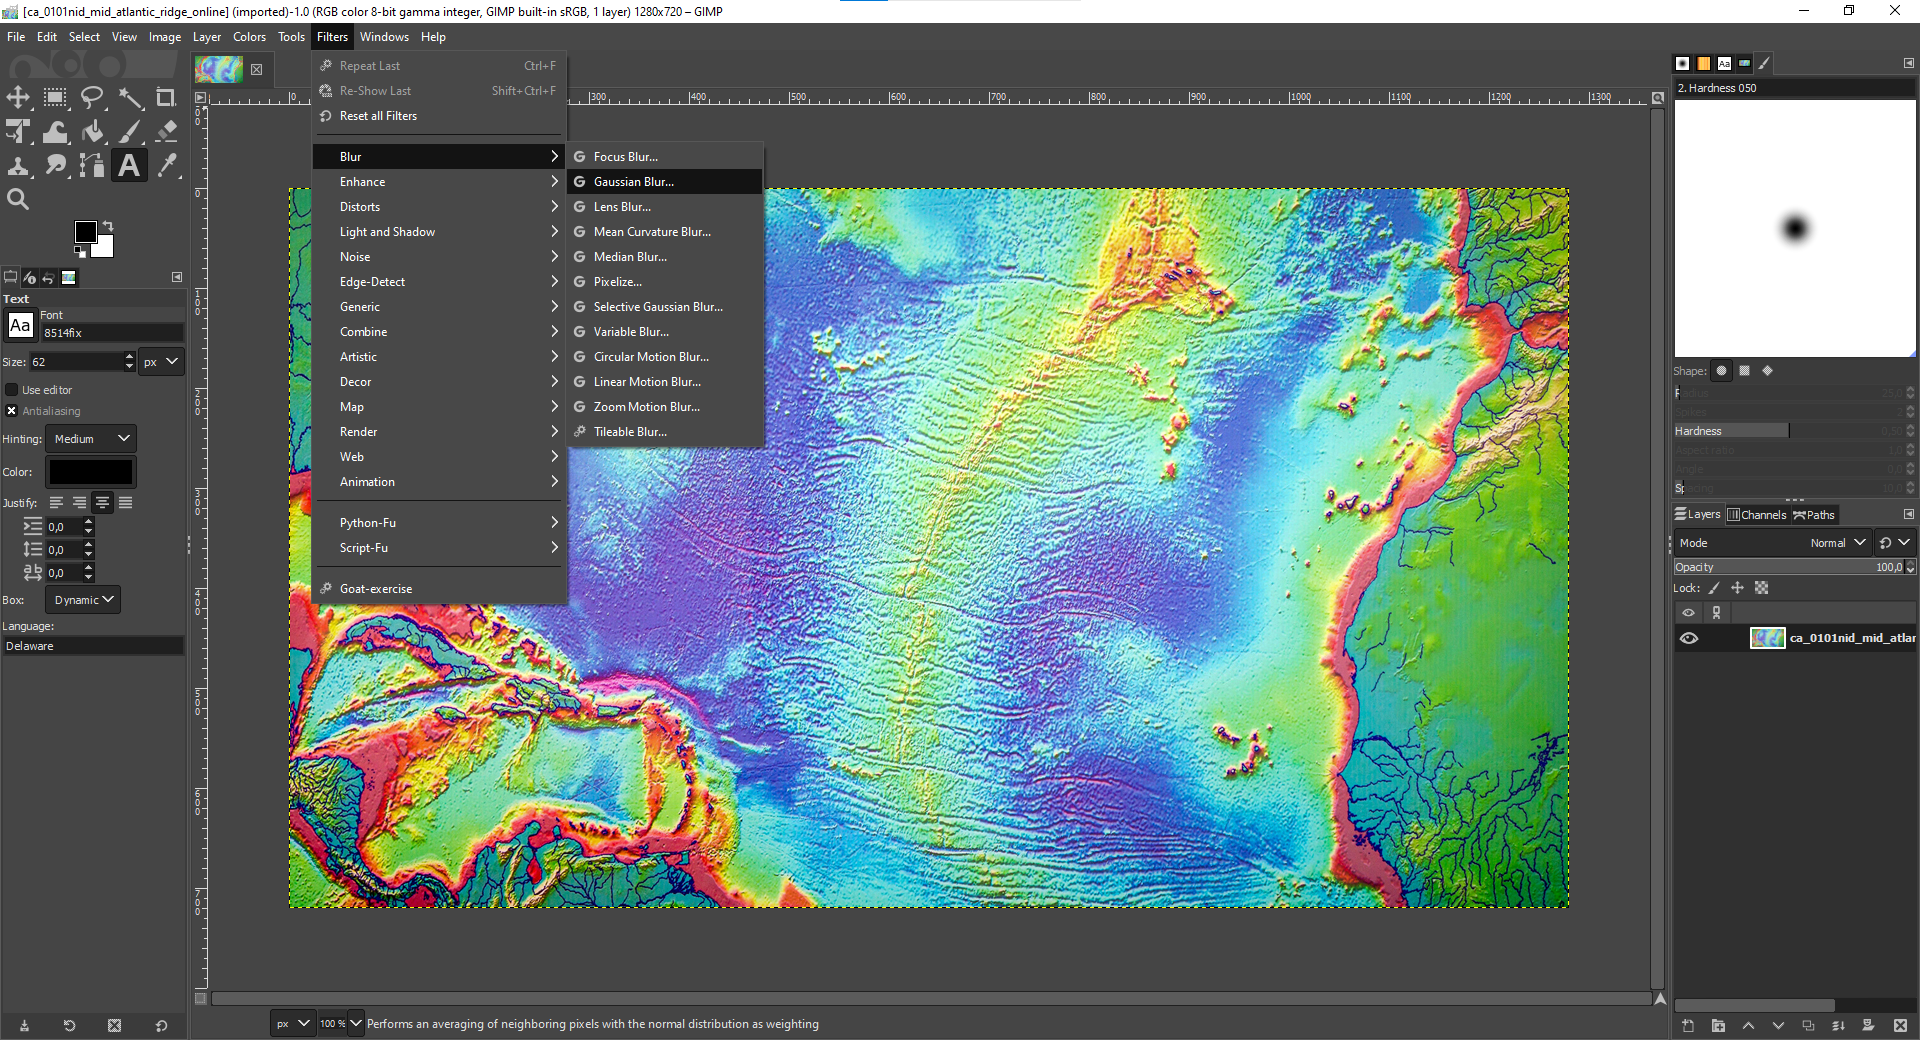
Blur the image using a Gaussian Blur, which performs an averaging of neighboring pixels with the normal distribution as weighting.
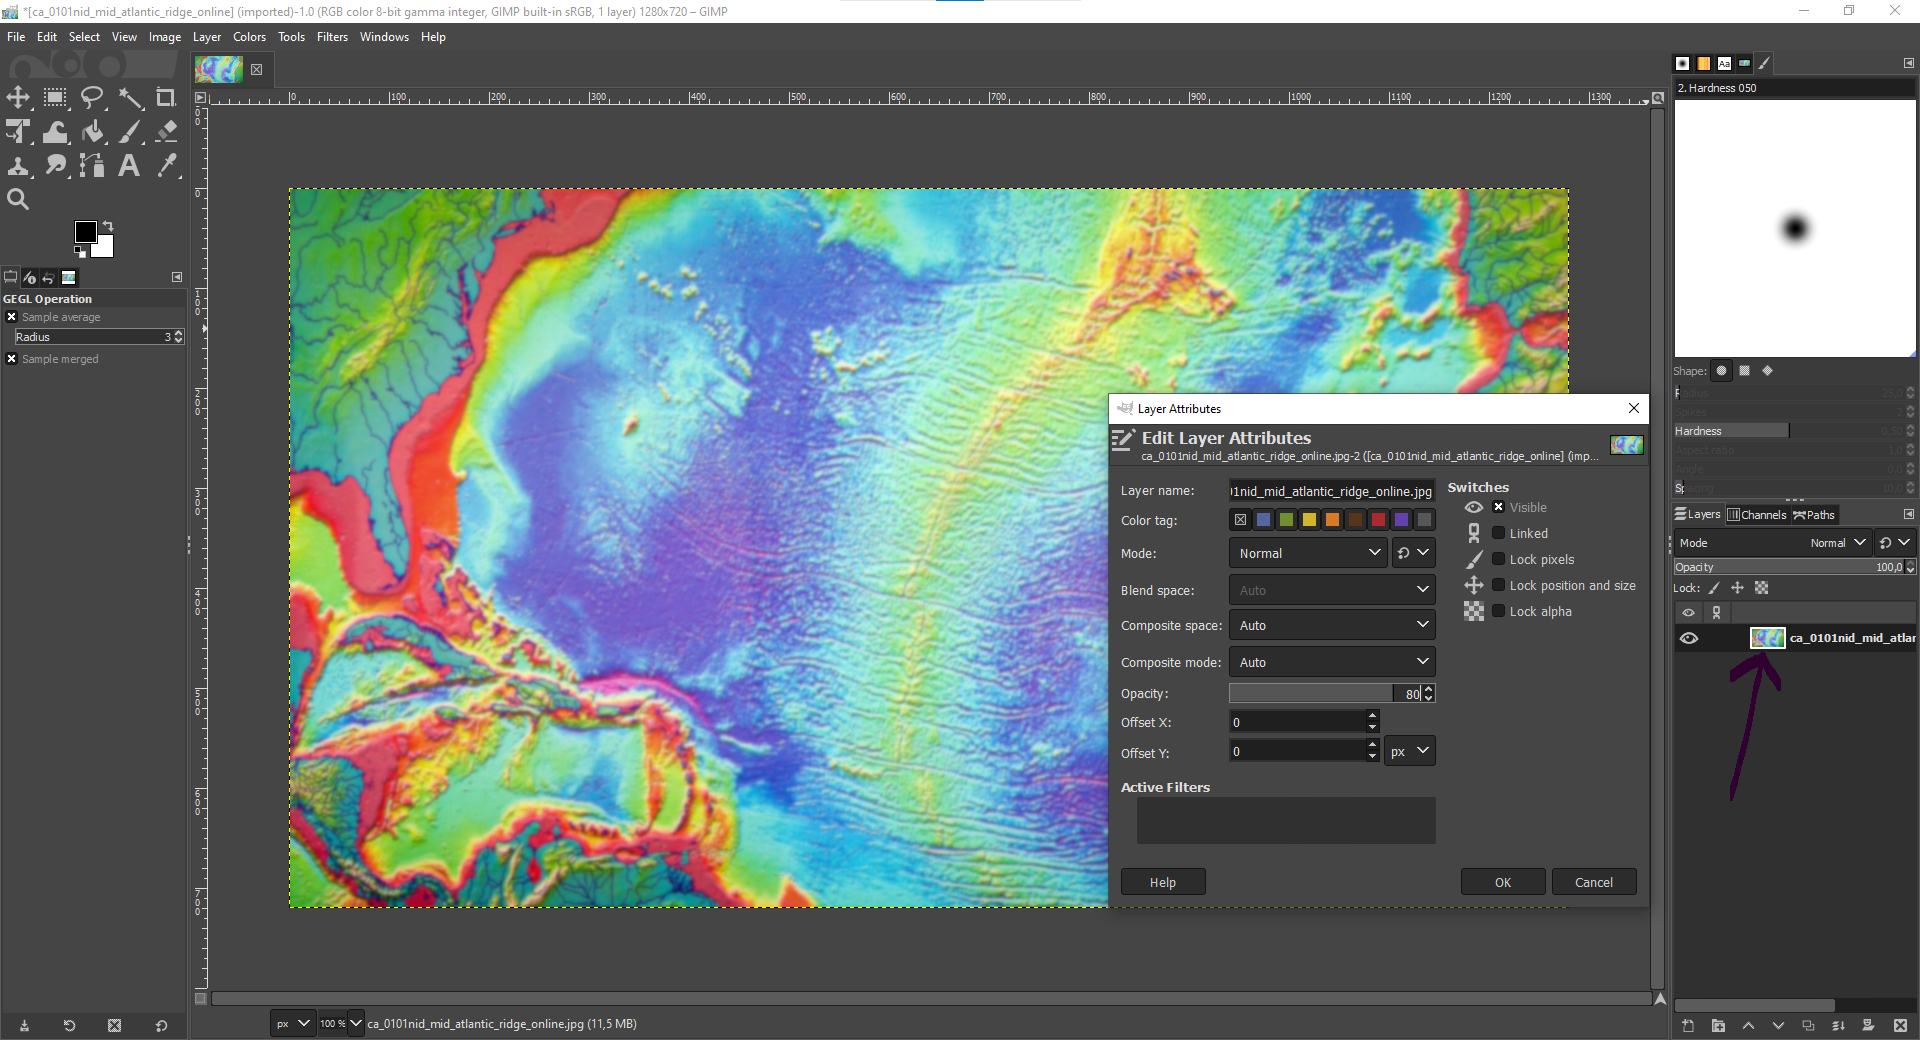
Click on the figure on the right hand side and adjust the opacity, such that the white title can be read better later on (here changed to 80%).
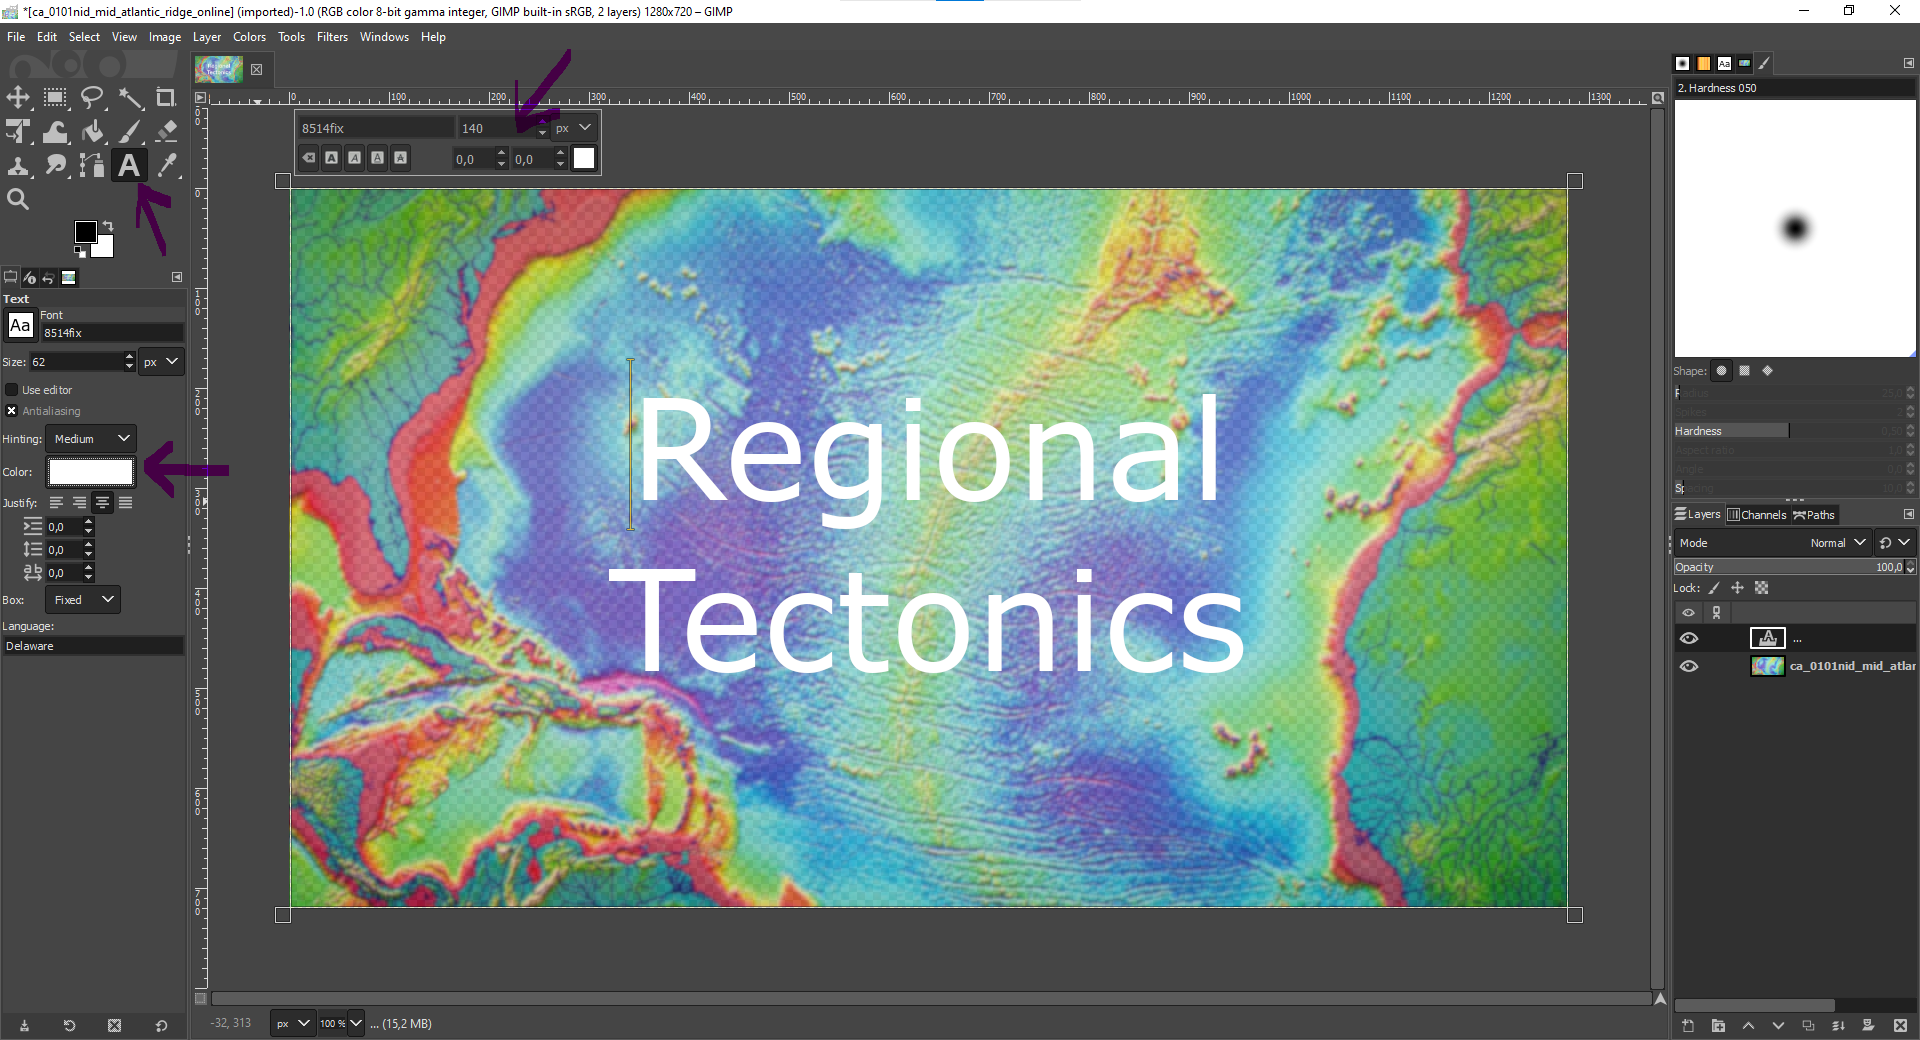
Place a textbox over the entire figure. Select a centered justification, choose the color white and and adjust the font (here 140).
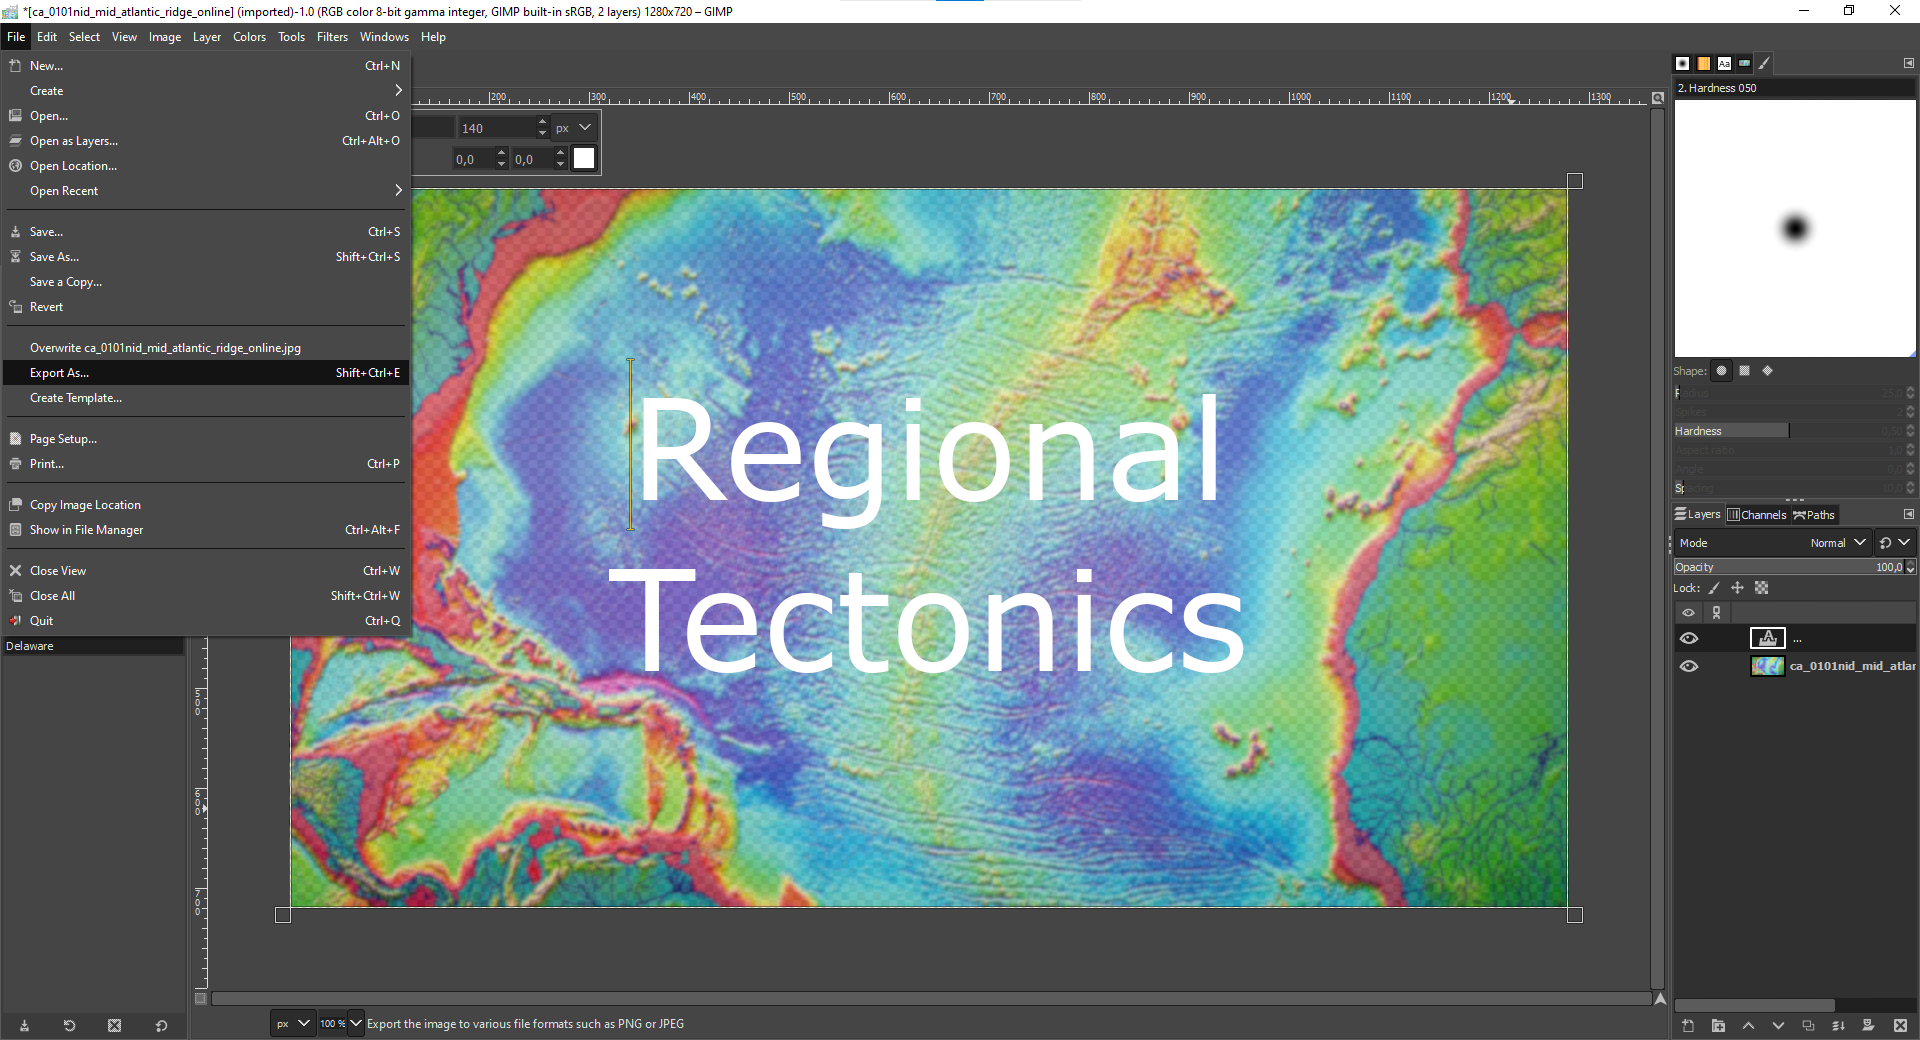
Select Export As… and choose again .png.
Now the figure including a title for the next blog post is prepared.
Do you want to get an overview how to use Markdown for blog posts in general? Make sure to check out this Sample Post.